The sound is unmistakable: a steady drip, drip, drip inside a wall. Or perhaps it’s the sight of a dark, spreading stain on the ceiling. Discovering a water leak in your home can trigger immediate panic, and for good reason.
A water leak is not just a plumbing problem; it's a direct threat to your home's structural integrity and your family's health.
This guide is designed to cut through the panic and provide a clear, practical action plan. It is a popular science guide aimed at helping you understand the urgency of the situation and the immediate steps you can take to mitigate damage. By acting quickly and correctly, you can prevent a minor leak from turning into a major financial disaster.
The single most important thing to understand about a water leak is that the damage is not linear; it's exponential. The longer water is allowed to sit, the more severe and expensive the consequences become. Procrastination is your worst enemy.
The 48-Hour Mold Window: This is the most pressing health and financial concern. Under damp, humid conditions, mold spores can begin to grow on wet surfaces in as little as 24 to 48 hours. What starts as an invisible spore can quickly colonize wet drywall, insulation, and wood, releasing allergens into the air. Mold remediation is a specialized and costly process that is far more expensive than simply drying out a wet area.
Structural Damage: Water is incredibly destructive to common building materials. It can cause drywall to swell, bubble, and eventually crumble. It soaks into wooden studs and subfloors, leading to rot and compromising the structural integrity of your home. Wet insulation becomes compressed and loses its ability to insulate, leading to higher energy bills.
The Cost Escalation: A problem that could have been a few hundred dollars can easily escalate into many thousands if left unaddressed for even a few days. The longer you wait, the more invasive and expensive the repairs become.
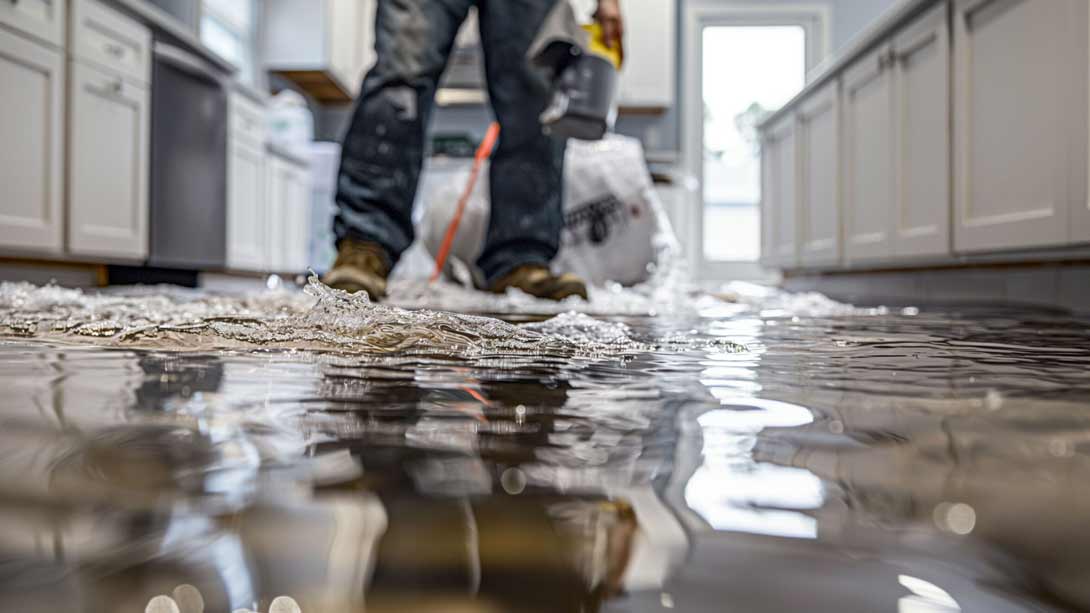
When you find a leak, your immediate actions are critical. Follow these five steps in order to protect your home. Before you begin, always address electrical safety first. If water is near any outlets or fixtures, shut off the power at the circuit breaker.
Step 1: Immediately Control Water and Drain
Your first priority is to stop more water from entering and remove what is already there. First, shut off the source of the water, either at the fixture's shut-off valve or at the main water supply for your house. Next, begin to drain and remove standing water. Use mops, old towels, buckets, and a wet-dry vacuum to get as much water off the floors and surfaces as possible. The faster you remove the bulk of the water, the less will be absorbed into your walls and subfloors.
Step 2: Force Drying and Dehumidification
Once the standing water is gone, the real drying begins. Your goal is to aggressively remove moisture from the air and surrounding materials. Create an environment of maximum airflow. Set up multiple fans (box fans, oscillating fans) and aim them directly at the wet areas to promote evaporation. At the same time, run a dehumidifier in the affected room to pull the excess moisture out of the air. This combination of airflow and dehumidification is crucial for drying out materials you can't see.
Step 3: Inspect and Remove Damaged Materials (Not Removing = High Mold Risk)
This is a step many people hesitate on, but it is essential. Porous materials that have been saturated with water are almost impossible to dry out completely before mold begins to grow. If drywall feels soft or spongy, or if carpet and padding are soaked through, they generally must be removed. Cut out the affected section of drywall, extending a few inches into the dry area to ensure you get all the moisture. Pull up and discard wet carpet padding. Not removing these materials is one of the biggest mistakes homeowners make, as it creates a hidden, moist environment perfect for mold growth.
Step 4: Perform Mold Prevention Treatment
After removing the damaged materials and allowing the area to dry thoroughly for several days, it's wise to treat the exposed surfaces to prevent any residual mold spores from growing. Clean all affected surfaces—including the exposed wood studs, subfloor, and the back of the remaining drywall—with a suitable cleaning agent. This step helps ensure that when you rebuild, you are not sealing a future mold problem inside your walls.
Step 5: Inspect for Structural Damage
With the area now open and dry, take the opportunity to carefully inspect the underlying structure. Look at the exposed wood studs and subfloor. Is the wood still solid, or does it feel soft and spongy? Are there any dark, discolored areas that could indicate the beginning of rot? A small area of surface discoloration might be fine, but if the wood has lost its structural integrity, it will need to be repaired or replaced by a professional before you close up the wall.
The DIY approach is only suitable for minor, clean-water leaks that are caught immediately and are limited to a small, accessible area. For most significant leaks, calling a professional is essential.
When to Call a Professional:
You cannot find the source of the leak.
The water has been sitting for more than 24-48 hours.
The affected area is large, involves multiple rooms, or has water coming from the ceiling above.
You already smell a musty or moldy odor.
The water is from a contaminated source, such as a sewage line or a flood.
You are not physically able or comfortable with performing the necessary demolition and repairs.
How to Save Money When Hiring Professional Services:
Call Your Insurance First: Before hiring anyone, contact your homeowner's insurance company to understand your coverage, your deductible, and their claims process.
Get Multiple Quotes: For a major job, try to get at least two or three quotes from reputable water damage restoration companies.
Check for Certifications: Look for companies whose technicians are certified by the IICRC (Institute of Inspection, Cleaning and Restoration Certification). This is the industry standard.
Precautions:
Be wary of any company that uses high-pressure sales tactics or asks you to sign a broad, vague contract. A reputable restoration professional will use moisture meters to show you exactly what is wet, provide a clear scope of work, and explain the drying process to you. The primary goal is to return your home to a safe and healthy condition, and making the right decisions in the first few hours is the key to achieving that outcome with the least amount of damage and cost.
When a leak is detected, immediate action is crucial to prevent mold and costly repairs. The first priority is to stop the source of the water and ensure electrical safety. Your immediate next steps should be to remove standing water, begin aggressive drying with fans and dehumidifiers, and, most importantly, remove any saturated porous materials like drywall and carpet padding to prevent mold growth. After treating the area and inspecting for structural issues, you can begin repairs. For any significant leak, it is essential to call a professional restoration company to ensure the job is done correctly and safely.